Sharing the Knowledge Dashboard
Modified on: Fri, 13 Nov, 2020 at 11:35 AM
You will be able to share the Knowledge Dashboard of all the trainings regardless of their status: "Deleted", "Published", "Active" and " Completed".
Trainings with "Published" status will not have data in the Knowledge Dashboard but you can schedule it in advance if you need it.
There are two ways to share a Knowledge Dashboard:
Send the Knowledge Dashboard
Within the Knowledge Dashboard of a training:
Click on the "Share dashboard" button in the menu at the top right
On the pop-up window:
Type in the email addresses separated by commas (,)
Enter an explanatory comment. Click on the lower right corner if you need to enlarge the "Comment" field for a better view
Enable "Allow filtering" by clicking on the "Blue box" button
Click on the "OK" button to send or click on the "Cancel" button to cancel

Schedule the sending of the Knowledge Dashboard
Within the Knowledge Dashboard of a training:
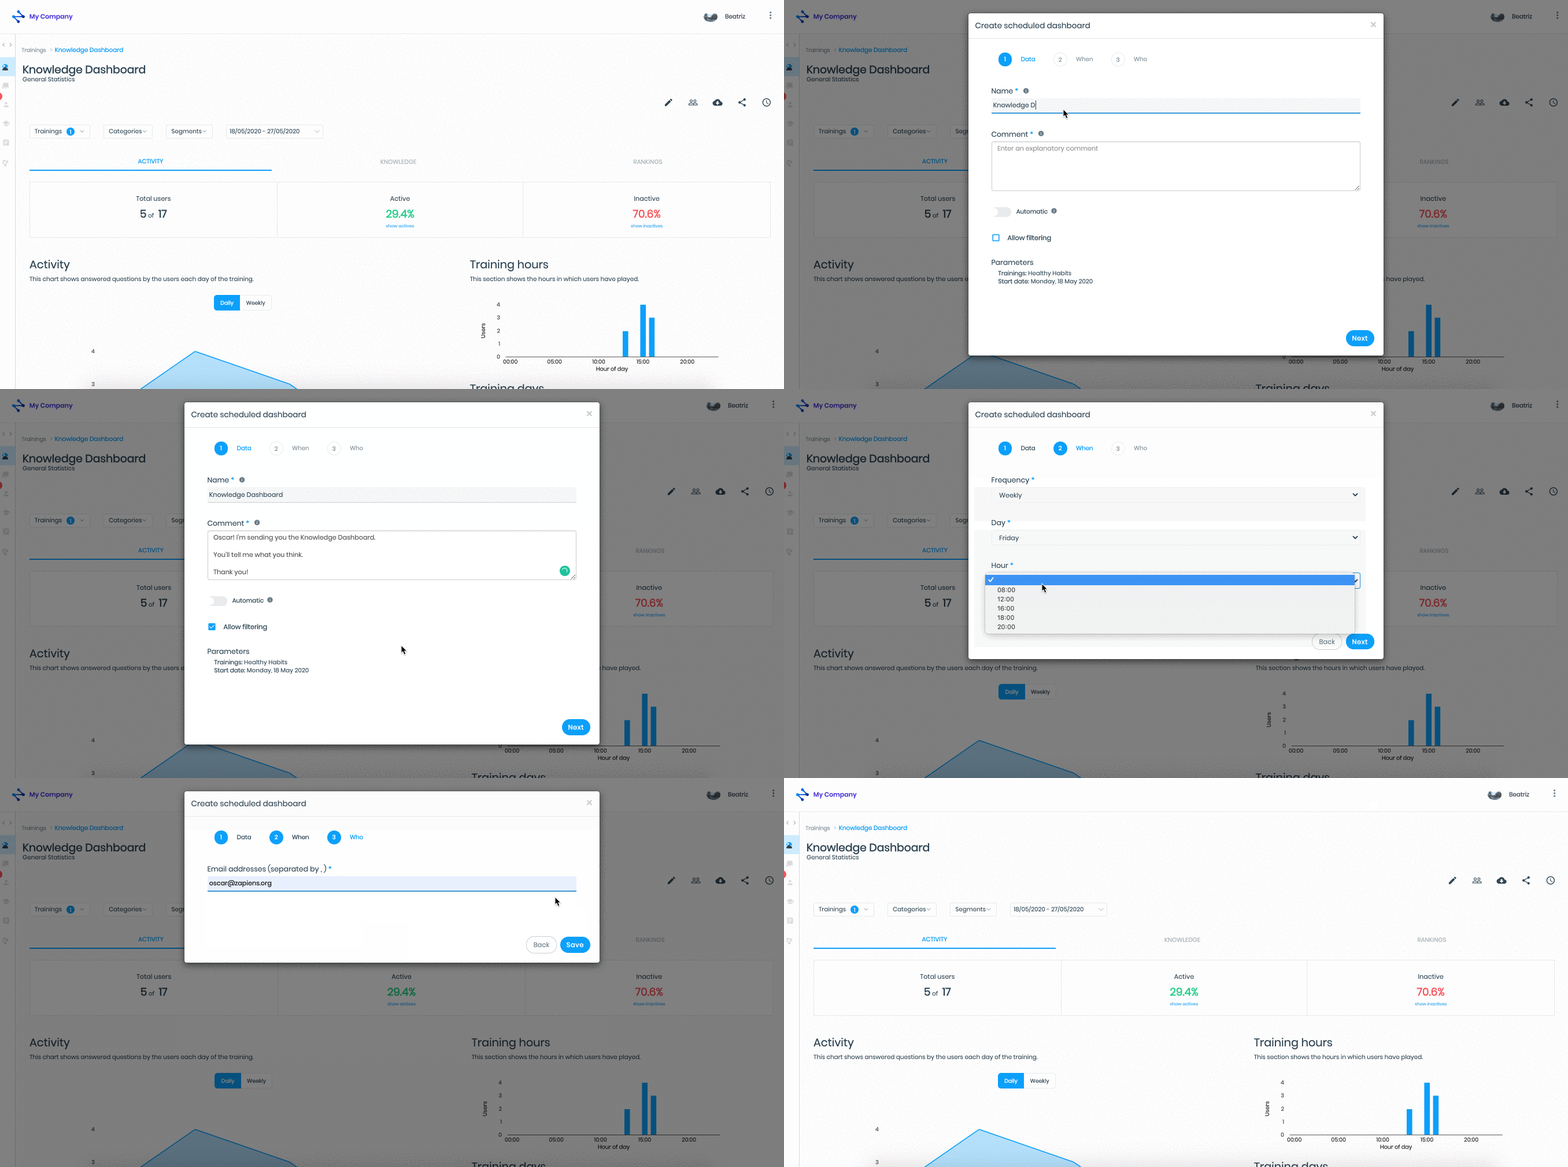
Click on the "Clock" button in the menu at the top right
The pop-up window covers the different sections:
Data:
Name: Write the subject of the email
Comment: Enter an explanatory comment. Click on the lower right corner if you need to enlarge the "Comment" field for a better view
Automatic: Enable this feature if you want to send, to the same recipients, the Knowledge Dashboards of all active trainings. In one click, you program Dashboards for all active trainings, wonderful!
Enable "Allow filtering" by clicking on the "Blue Box" button. Check out our article Apply filters in the Knowledge Dashboard
Parameters: Indicates the name of the training and its start date
Click on the "Next" button to access:
When:
Frequency: Click on the field to select one of the options: Daily, weekly, monthly
Day: Click on the field to select a day of the week or month
Time: Click on the field to select the time
Click on the "Next" button to access:
Recipients: Enter the email addresses separated by commas (,)
Click on the "Save" button or click the "Back" button to edit
The new scheduled Knowledge Dashboard will appear in the list:
Click on the "Three-point vertical" button on the right side of the window to "Edit" or "Delete" the scheduled Knowledge Dashboard

Note: The "Email addresses" and "Comment" fields are limited to 1000 characters.
Check out our articles in the Knowledge Management section to discover and understand how to manage your organization's knowledge in Zapiens.
Did you find it helpful?
Yes
No
Send feedback Sorry we couldn't be helpful. Help us improve this article with your feedback.
 check ticket status
